The Monobjc MonoDevelop addin does not provide an UI designer. In order to design the UI part of the application, the addin uses the installed Apple Developer Tools, especially Xcode.
Why using Xcode to design the UI ?
The Xcode application provides a great UI designer that works pretty well. By using it, UI design remain simple and efficient.
How does it work ?
Xcode 3 Integration
With using Xcode 3, the UI design is handled by an application called Interface Builder. It is a separate application that is merely based on declarations. You declare the classes, wire outlets and action, and the result is stored in a xib file. When the Monobjc MonoDevelop addin detect that a xib file has changed, it parses it and generates the appropriate design code in .NET.
Note
The integration with Xcode 3 is now deprecated. Please update to Xcode 4 to benefit from the latest features of the Monobjc MonoDevelop addin.
Xcode 4 Integration
Since Xcode 4 has been released, some things have changed. The Interface Builder application does not exists anymore, and it is not possible to edit a xib file outside a project.
To work around this limitation, the Monobjc MonoDevelop addin creates a surrogate Xcode project that enables the UI design in Xcode. This surrogate project is created by the addin and exposes the .NET code as Objective-C classes to enable the UI design in Xcode.
In order to make the integration simple and robust, the synchronization is very basic:
- When you open a XIB file, the surrogate classes are created from the .NET code
- If you modify a XIB file and/or a header files, the changes are merged back into the .NET code when you get back to MonoDevelop/Xamarin
- If you make big changes to the project, remember to re-open a XIB file so the surrogate project is up-to-date.
Xcode 5 Integration
Xcode 5 uses the same integration as Xcode 4.
Configuration
In order to use the Xcode application, the Monobjc MonoDevelop addin needs the location of the Apple Developer Tools.
- In MonoDevelop, open the preferences.
- Select the Monobjc section.
- Select the root folder for the Apple Developer Tools. Once the install folder is selected, the preference pane shoud display the message Developer Tools X.Y.Z found.
- For Xcode 3 and for Xcode 4 up to 4.2, the standard folder to select is the
/Developerfolder. - For Xcode 4 starting from 4.3, the folder to select is the
/folder.
- For Xcode 3 and for Xcode 4 up to 4.2, the standard folder to select is the

Designing UI
Accessing the UI designer
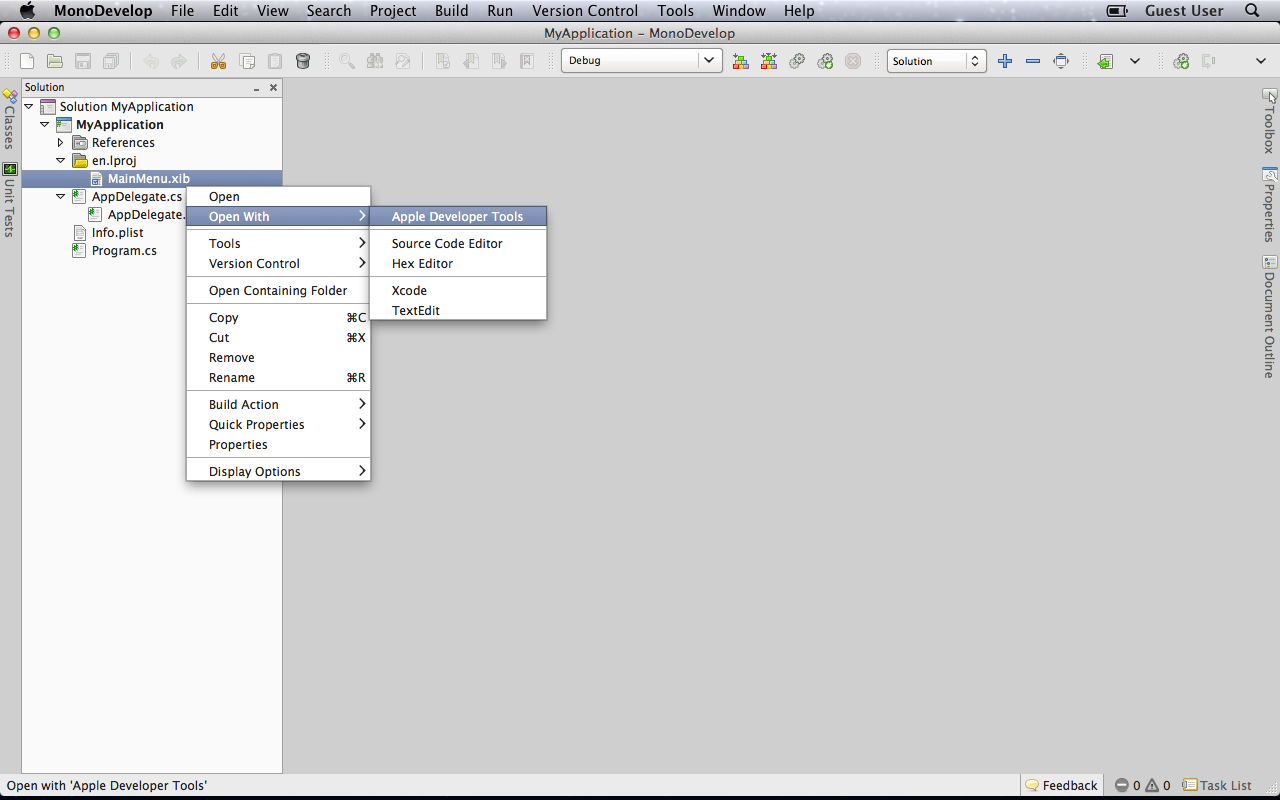
- In MonoDevelop, select the xib file you want to edit.
- Right-click on it and select Apple Developer Tools. This will launch the Xcode application.
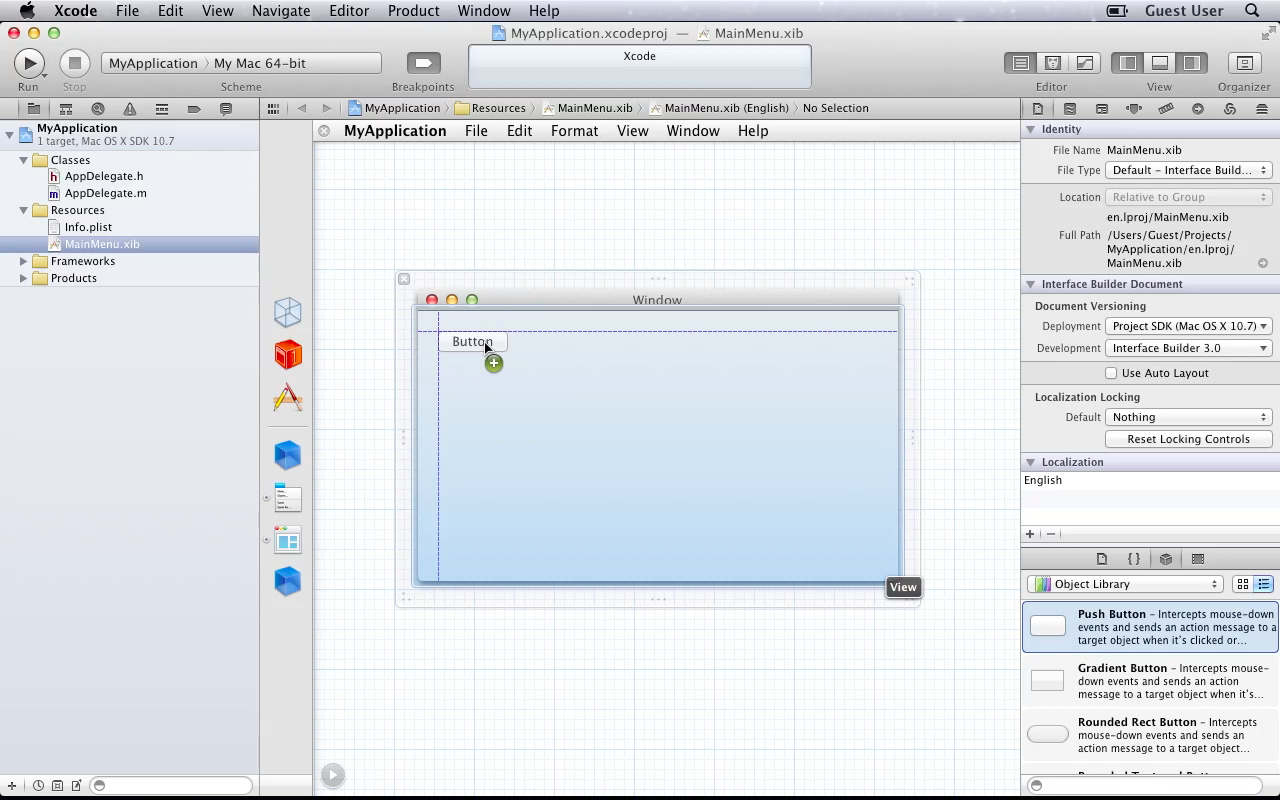
- In Xcode, the surrogate project has been opened. Expand the project and the Resources folder, to select the xib file to edit it.
Note
The surrograte project used to design the UI in Xcode is based on the .NET code. You can view that a header and a source file are generated for each .NET class exposed to the Objective-C runtime. This is required in order for Xcode to allow outlet or action creation.

Adding an outlet
- For the sake of this tutorial, we will add an outlet bound to a button control. Drag a button from the palette and drop it on the window.
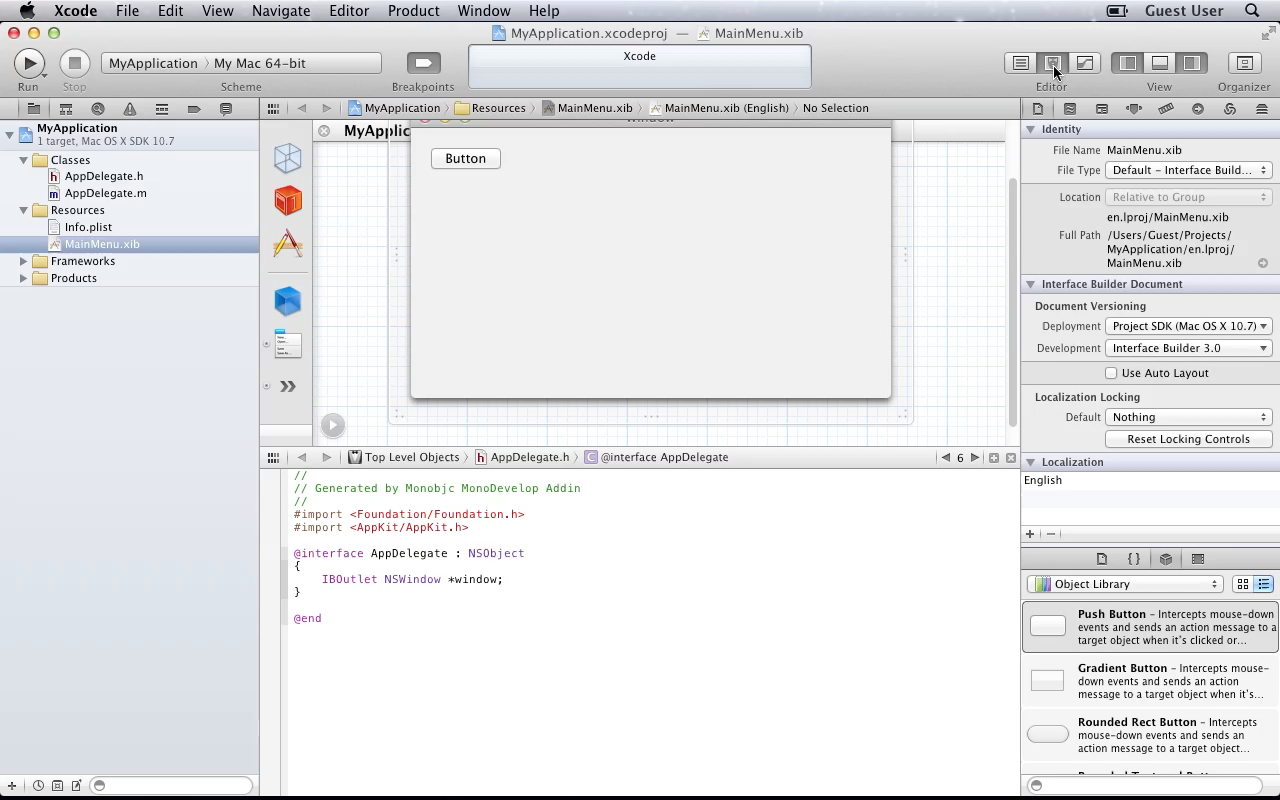
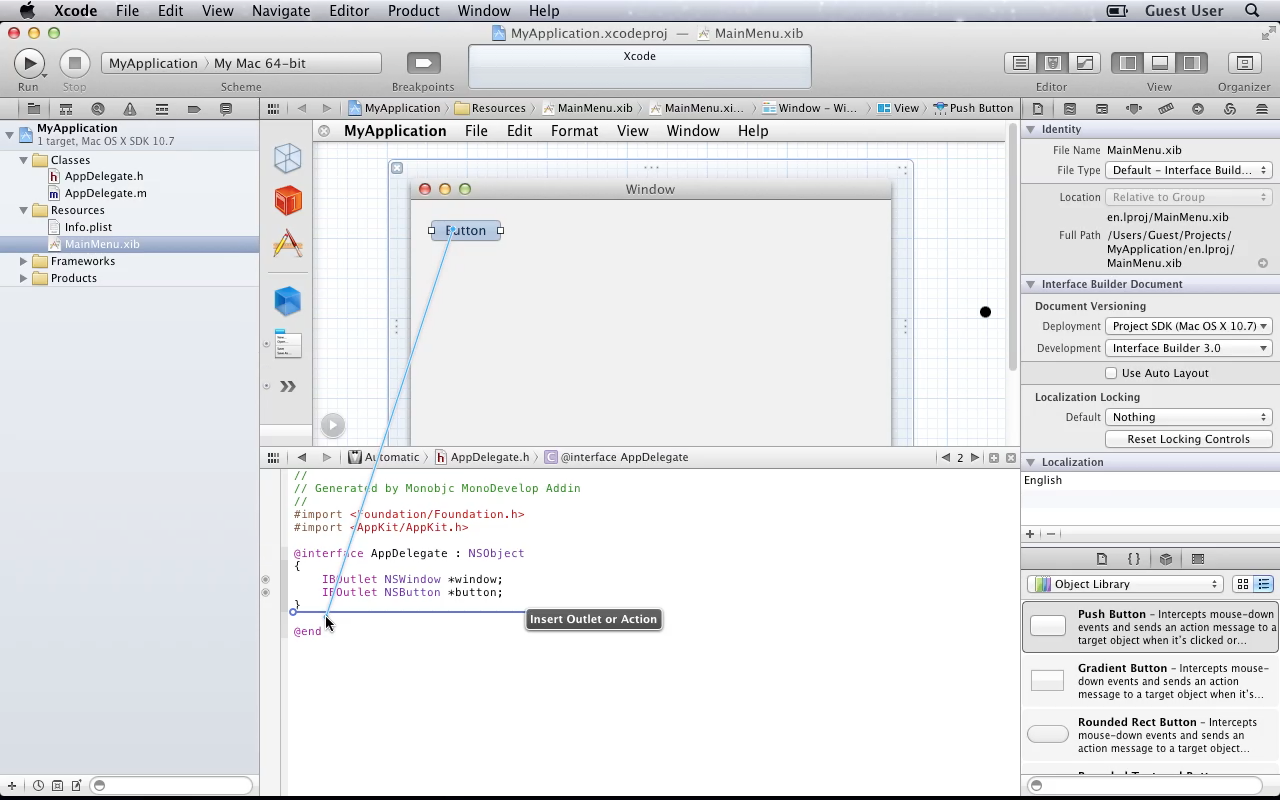
- In Xcode, click on the Wizard button to get a split view. On the top, the xib file is displayed, and on the bottom select the header file where you want to add the outlet.
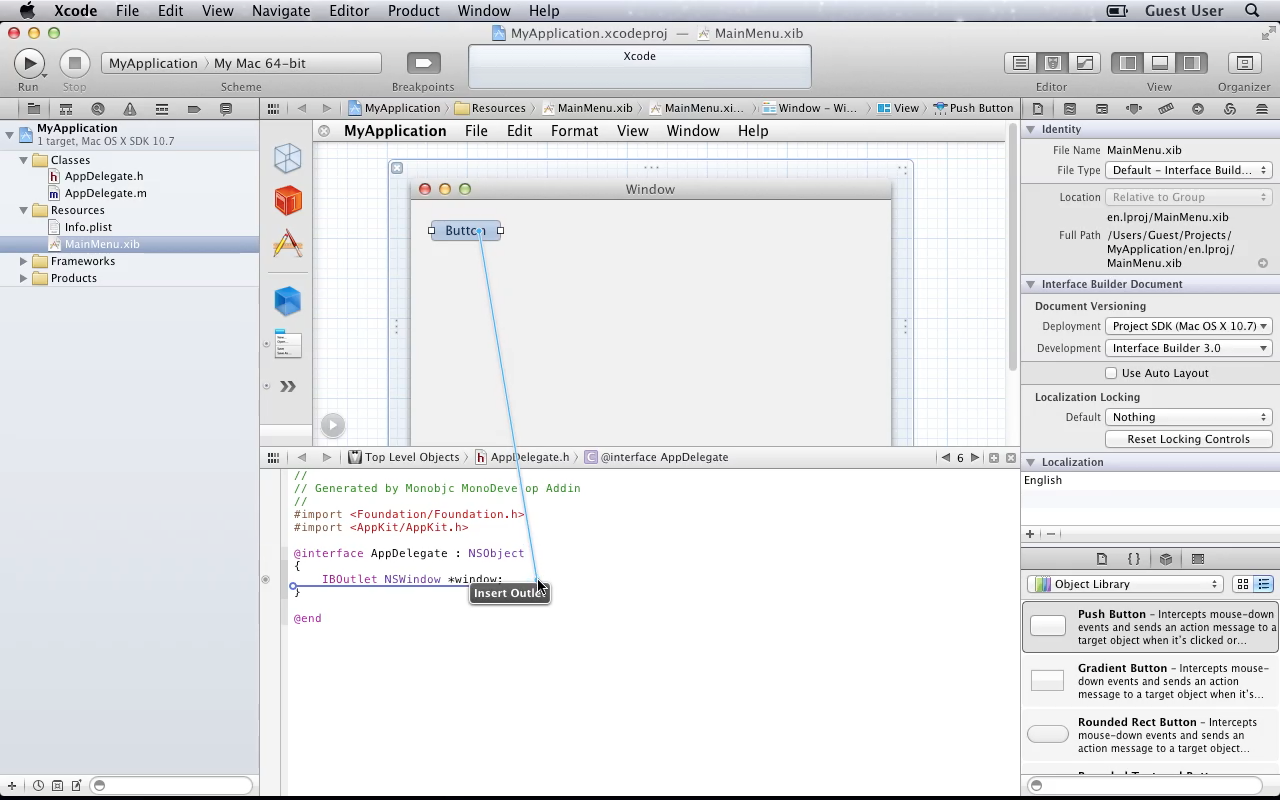
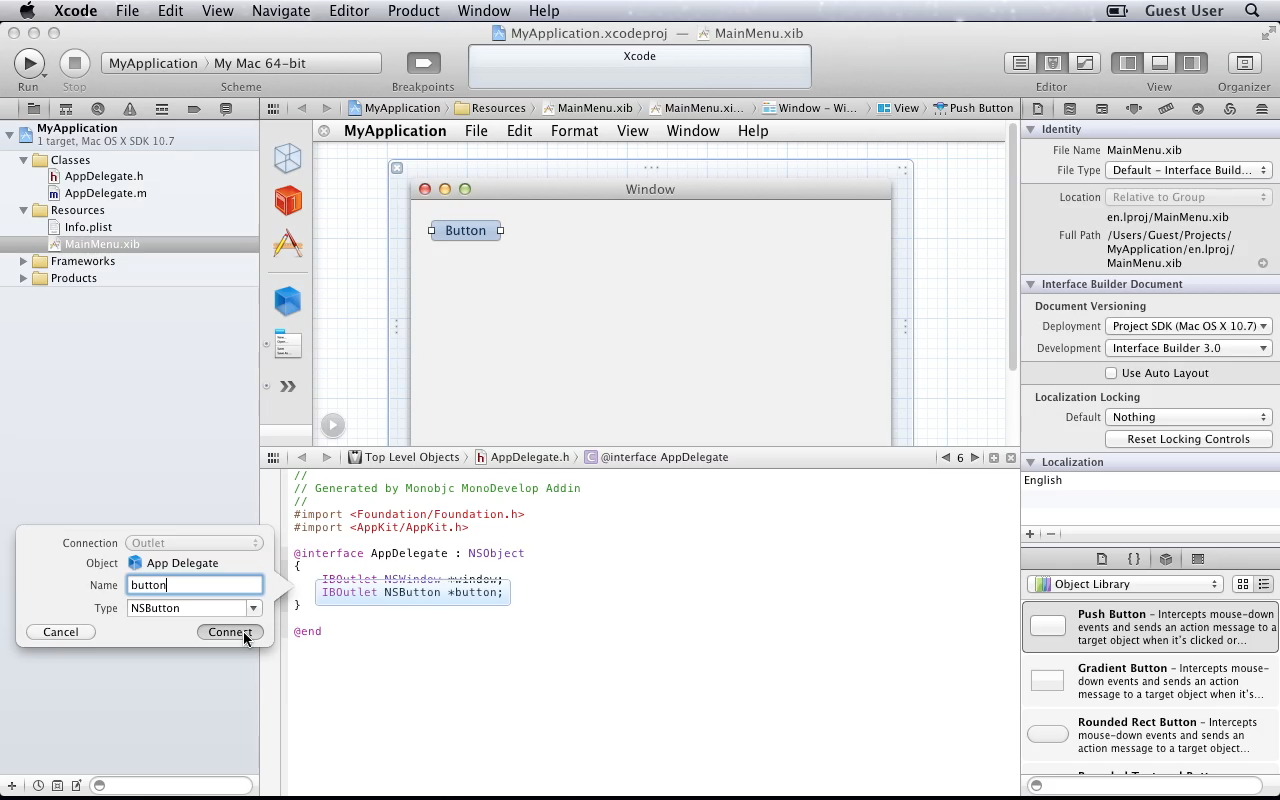
- Press and maintain the CTRL key while clicking and dragging the UI control to the header file. Xcode will let you choose if you want to create an outlet or an action.
- Give a name to the outlet. The outlet is now defined in the header file and bound the UI control.
- Click in the UI zone and save the xib file.
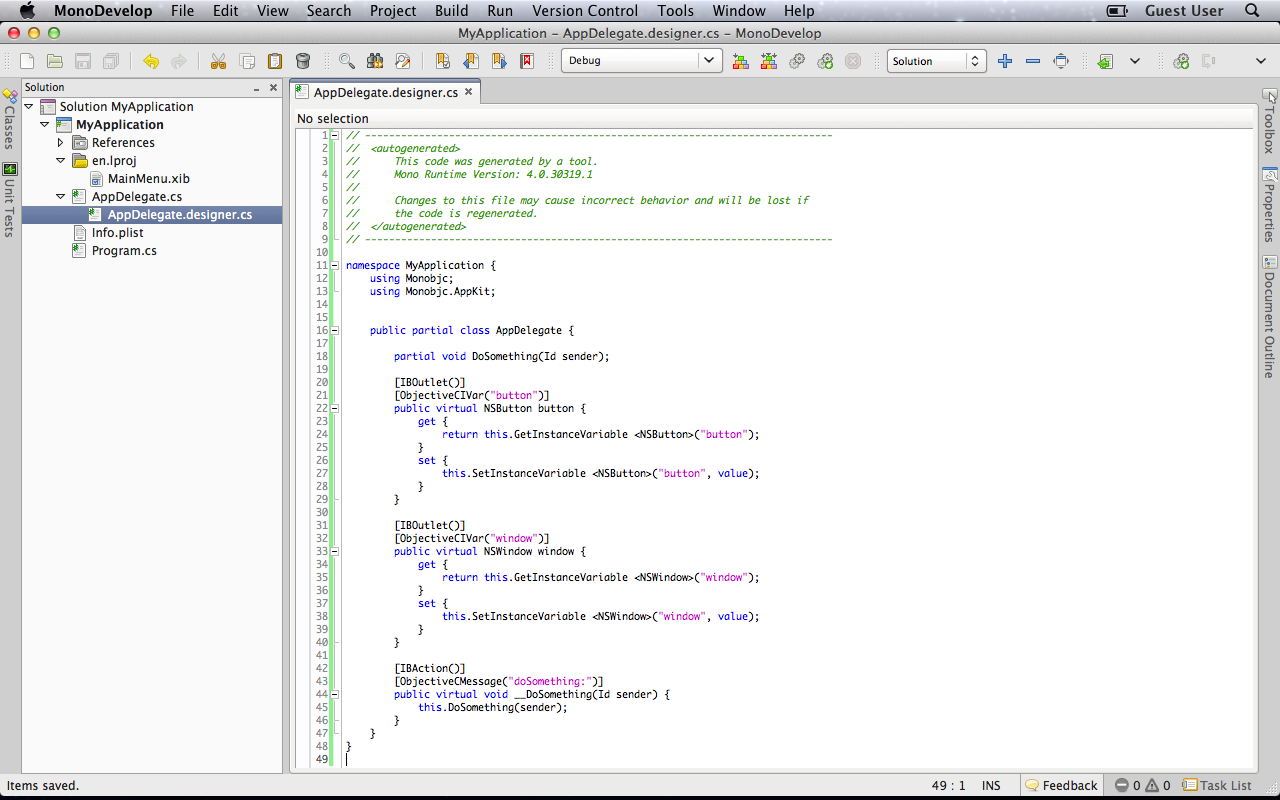
- When you return to MonoDevelop, the addin will parse it and generates the appropriate design code in .NET.
Note
The surrograte project used to design the UI in Xcode is based on the .NET code. There is no double-way synchronization between Xcode and MonoDevelop. The MonoDevelop project is the reference. If you edit the header files in Xcode, they are not picked up by the Monobjc MonoDevelop addin. Only the xib files are processed.
Adding an action
- For the sake of this tutorial, we will bind the button to an action.
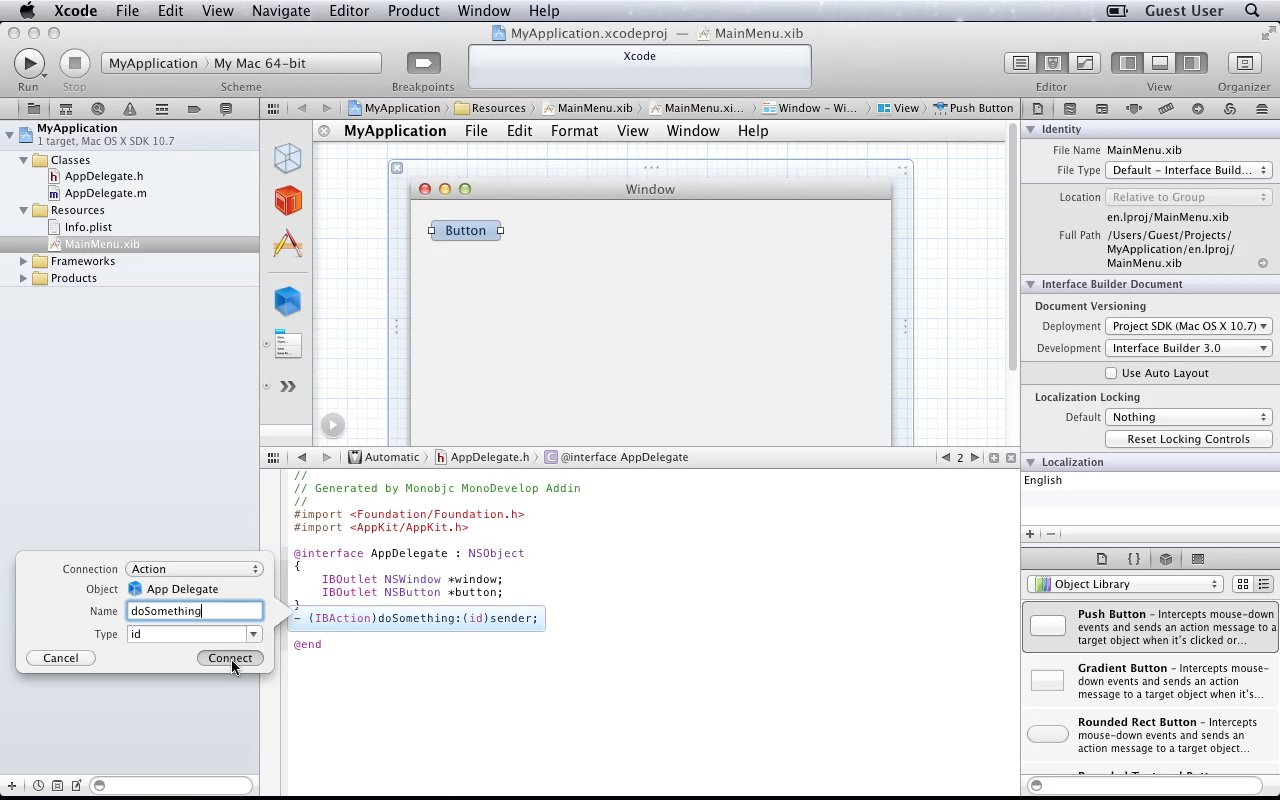
- Press and maintain the CTRL key while clicking and dragging the UI control to the header file. Xcode will let you choose if you want to create an outlet or an action.
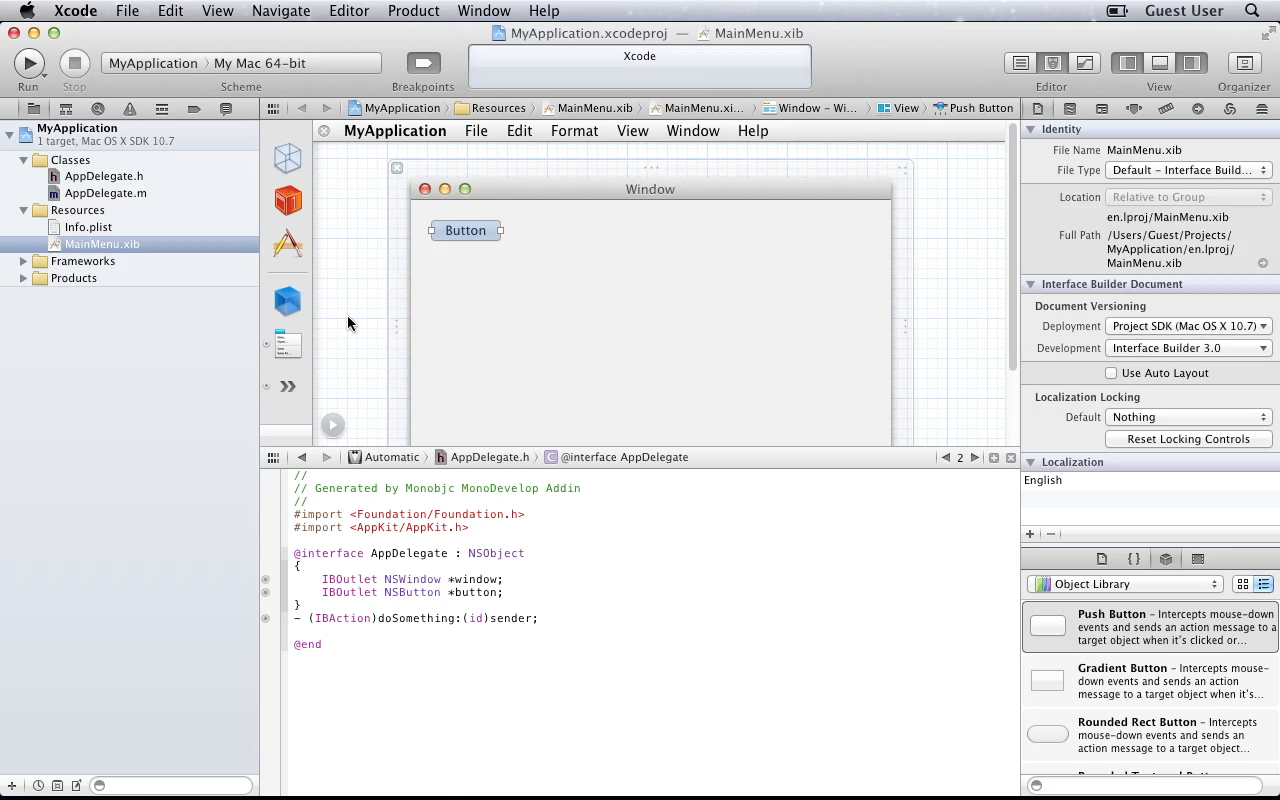
- Give a name to the action (don't forget to put a colon at the end). The action is now defined in the header file and bound the UI control.
- Click in the UI zone and save the xib file.
- When you return to MonoDevelop, the addin will parse it and generates the appropriate design code in .NET.
Note
The surrograte project used to design the UI in Xcode is based on the .NET code. There is no double-way synchronization between Xcode and MonoDevelop. The MonoDevelop project is the reference. If you edit the header files in Xcode, they are not picked up by the Monobjc MonoDevelop addin. Only the xib files are processed.